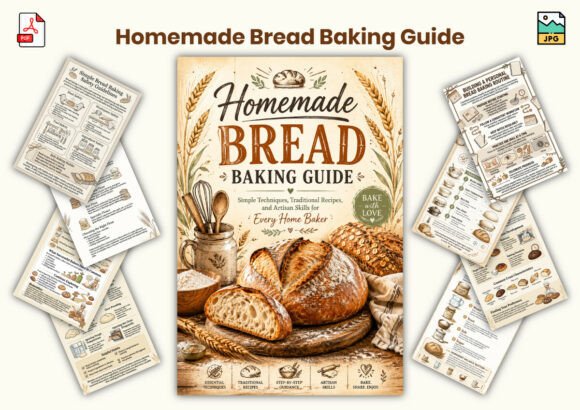
The Art of Homemade Bread Baking: Simple Techniques, Traditional Recipes, and Artisan Skills
There is something deeply satisfying about pulling a golden, crusty loaf of bread from your own oven. The aroma fills your kitchen, the crust crackles as it cools, and you know exactly what went into every bite. Homemade bread baking is both a craft and a science, and it is more accessible than most people imagine. Whether you are drawn to the rhythm of kneading dough or the joy of sharing fresh bread with family, understanding the fundamentals transforms baking from a chore into a rewarding practice. The Homemade Bread Baking Guide serves as a trusted companion for this journey, offering a structured yet warm approach to learning the essentials.
Why Bread Baking Matters in a Modern Kitchen
Baking bread at home is not merely about saving money or avoiding additives found in commercial loaves. It is about reconnecting with a foundational food skill that has nourished humanity for millennia. When you bake your own bread, you control every variable: the type of flour, the fermentation time, the amount of salt, and the final crust color. This level of control allows you to tailor loaves to your dietary needs, taste preferences, and even your schedule.
Modern life often feels rushed, and bread baking might seem like an activity reserved for weekends or holidays. Yet many bakers discover that a simple no-knead dough or a straightforward white loaf fits easily into a weekday routine. The Homemade Bread Baking Guide addresses this very concern by presenting techniques that respect both your time and your desire for quality. It acknowledges that not everyone has hours to spend on elaborate sourdough regimes, but everyone deserves a loaf that tastes authentic.
Understanding Essential Bread Ingredients
Every great loaf begins with a short list of ingredients: flour, water, yeast, salt, and sometimes sugar or fat. What seems simple on the surface reveals remarkable depth when you examine how each component functions.
Flour: The Backbone of Structure
Flour provides the gluten proteins that give bread its structure and chew. All-purpose flour works well for many recipes, but bread flour with higher protein content produces a stronger, more elastic dough. Whole wheat flour adds nutrition and a nutty flavor, though it requires more hydration and a gentler handling approach. The Homemade Bread Baking Guide dedicates careful attention to flour selection, helping you understand when to use each type and how blending flours can create unique textures and flavors.
Yeast: The Living Engine
Yeast is the microorganism that ferments sugars and produces carbon dioxide, causing dough to rise. Active dry yeast, instant yeast, and fresh yeast all have their place in a home baker's pantry. Instant yeast offers convenience and reliability, while active dry yeast requires proofing in warm water. For those drawn to traditional methods, a sourdough starter captures wild yeast and bacteria, yielding bread with complexity and longevity. The guide explains these options without judgment, letting you choose the path that fits your lifestyle.
Water, Salt, and Sugar
Water hydrates the flour and activates gluten development. The temperature of water affects fermentation speed, which is why many recipes specify warm water for faster rises and cool water for slower, more flavorful fermentation. Salt strengthens gluten, controls yeast activity, and enhances flavor. Sugar provides food for yeast and contributes to browning, but too much can slow fermentation. Understanding these relationships is where the Homemade Bread Baking Guide shines, breaking down the science into practical advice you can apply immediately.
The Science of Fermentation
Fermentation is the heart of bread making. It is the process by which yeast and bacteria transform simple flour and water into a complex, aromatic dough. During fermentation, gases expand the dough, acids develop tang, and enzymes break down starches into sugars that feed the yeast and contribute to crust color.
Many home bakers underestimate how much fermentation time affects the final loaf. A short rise yields a mild, dense bread, while a long, slow fermentation in the refrigerator produces a loaf with deep flavor, an open crumb, and a crisp crust. The Homemade Bread Baking Guide provides clear timetables and visual cues so you can recognize when dough has fermented properly, regardless of the ambient temperature in your kitchen.
Temperature is a critical factor here. Dough fermented at 75°F might be ready in two hours, while the same dough at 65°F could take four hours or more. Rather than offering rigid rules, the guide teaches you to read your dough: its feel, its smell, its volume. This skill empowers you to bake confidently even when conditions are not ideal.
Dough Mixing and Kneading Techniques
Mixing ingredients together is just the beginning. The way you combine flour and water influences gluten development from the very first moment. Some bakers prefer to mix flour and water and let them rest for twenty minutes before adding yeast and salt. This method, known as autolyse, allows gluten to form naturally, reducing the need for aggressive kneading later.
Kneading is the physical manipulation that aligns gluten strands into a strong, elastic network. Traditional kneading involves pushing, folding, and turning the dough for eight to twelve minutes. The Homemade Bread Baking Guide demonstrates proper hand position and technique so you can feel when the dough is ready. A well-kneaded dough should be smooth, supple, and slightly tacky, not sticky. It should hold its shape when rounded and pass the windowpane test, where a small piece stretches thin enough to see light through without tearing.
For those who prefer less hands-on work, the guide also covers no-knead methods that rely on time and moisture rather than physical effort. These methods produce excellent results with minimal labor, making them ideal for busy schedules or beginners who are still building confidence.
Dough Rising and Proofing
After kneading comes the first rise, or bulk fermentation. During this stage, the dough increases in volume as yeast produces gas. The dough should be placed in a lightly oiled bowl, covered, and left in a warm, draft-free spot. Rising times vary widely depending on recipe, temperature, and yeast type. The Homemade Bread Baking Guide advises watching the dough rather than the clock. A properly risen dough will have nearly doubled in size, feel airy when pressed, and spring back slowly.
Shaping follows the first rise. This step deflates the dough slightly and forms it into its final shape: a round boule, an oblong batard, a sandwich loaf, or individual rolls. Proper shaping creates surface tension, which helps the bread hold its shape and rise upward rather than spreading outward. The guide includes step-by-step shaping instructions with descriptions of how the dough should feel at each stage.
The final proof is the last rise before baking. It can be short, around thirty minutes, or extended overnight in the refrigerator. Cold proofing concentrates flavor and makes scoring easier. The guide explains how to test whether proofing is complete: a gentle poke should leave a small indentation that slowly fills back in. If the dent springs back immediately, the dough needs more time. If it does not spring back at all, the dough may be over-proofed and risks collapsing in the oven.
Baking Principles and Crust Development
Baking transforms proofed dough into bread with a crisp crust and tender interior. Oven temperature matters tremendously. Most bread recipes call for a preheated oven between 375°F and 500°F. The higher heat creates steam inside the dough, which expands the air pockets before the crust sets. This phenomenon is called oven spring, and it is responsible for that beautiful open crumb structure.
Steam is also essential for crust development. Professional bakers inject steam into their ovens, but home bakers can achieve similar results by placing a pan of hot water on the lower rack or spraying the oven walls with water just after loading the loaf. The Homemade Bread Baking Guide provides several practical methods for creating steam without specialized equipment, making artisan-style crusts achievable in any home kitchen.
Baking times vary by loaf size and shape. A small roll might bake in fifteen minutes, while a large sourdough boule could take forty-five or more. The guide suggests using an instant-read thermometer to check doneness: the internal temperature of fully baked bread should be around 190°F to 210°F, depending on the recipe. Allowing the bread to cool completely on a wire rack is crucial because the interior continues to set as it cools. Cutting into a hot loaf releases steam and results in a gummy texture.
Essential Bread Baking Equipment
You do not need a professional kitchen to bake excellent bread at home. The Homemade Bread Baking Guide lists the truly essential tools: a large mixing bowl, a bench scraper, a kitchen scale, a thermometer, and a baking surface such as a baking stone or a cast iron Dutch oven. A scale is especially important because measuring flour by volume can be inconsistent, while weighing in grams ensures precision every time.
A Dutch oven is a favorite among home bakers because it simulates a steam-injected oven. The heavy pot retains heat and traps moisture released from the dough, creating an ideal environment for crust development. For those who do not own a Dutch oven, the guide explains how to use a baking stone with a steam pan, or even a simple sheet pan with a covered metal bowl.
Other helpful items include a lame or razor blade for scoring the dough, a proofing basket or banneton for supporting shaped loaves during the final rise, and a cooling rack. The guide emphasizes that you can start with minimal equipment and add tools as your skills grow. Many of the best loaves come from bakers who learned to work with what they had.
Practical Observations and Recommendations
One common mistake new bakers make is adding too much flour during kneading. Dough that feels sticky often needs more kneading rather than more flour. A wetter dough produces a lighter, more open crumb, while a dry dough yields a dense, tight texture. Trusting the process and keeping your hands lightly oiled or wet can help you handle sticky dough without compromising hydration.
Another observation is that bread baking improves with repetition. The first loaf may not be perfect, but each attempt teaches you something about fermentation, handling, and oven behavior. The Homemade Bread Baking Guide encourages a mindset of experimentation: try different flours, vary hydration levels, adjust proofing times. Over time, you develop an intuition that no recipe can fully convey.
For those who want to share their baking with family or friends, the guide includes tips on scaling recipes, freezing dough, and storing baked bread to maintain freshness. Bread stores well at room temperature in a paper bag or bread box for a couple of days, but freezing is excellent for longer storage. Slice before freezing so you can toast individual pieces as needed.
Bread Baking as a Lifelong Skill
Homemade bread baking is not a trend or a hobby reserved for specialists. It is a practical, nourishing skill that fits into modern life in countless ways. Whether you bake a simple sandwich loaf for weekly lunches, a rustic country boule for dinner guests, or enriched dough for sweet rolls on Sunday morning, the principles remain the same. The Homemade Bread Baking Guide serves as both a starting point and a reference you can return to as your skills evolve.
The guide's 29 pages are designed to be read, used, and revisited. Its rustic farmhouse style makes it inviting, while its clear typography and thoughtful layout ensure that you can find answers quickly when you are in the middle of a bake. From understanding the science of fermentation to mastering shaping and baking techniques, it covers the full spectrum of what a home baker needs to know.
Baking bread at home connects you to a tradition that spans cultures and centuries. It grounds you in the present moment while producing something tangible and delicious. With the right guidance and a willingness to learn, anyone can bake bread that rivals the best bakeries. The journey starts with a single loaf, and the Homemade Bread Baking Guide is the perfect map for that journey.